DIY Fabric Basket Tutorial
A perfect scrap buster and beginner project. These baskets are not only incredibly useful but make gorgeous gifts. I use them in the studio to collect all the fabric scraps and threads in class. Larger sizes are perfect for storing threads, scraps and even snacks. This simple tutorial will guide you through the process step by step.

These are the perfect beginner project. Once you have made one you won’t be able to stop!
One of the most popular projects I have taught in my classes at the Library. These little baskets are such a great beginner project, and you are left with a really useful storage container! I am delighted to finally have a full tutorial for you here so you can make them yourself anytime.
They are great as gift bags, to keep scraps and supplies in yoru sewing room and even as an alternative to dissposable crackers for your Christmas table.*I have even had someone suggest that they would be exactly the right thing to keep her balls of yarn organised in the car so the knitting just doesn’t have to stop! I love it. If you want to make some in a larger size just scale up the dimensions of the template.
Fabric Storage Baskets
Tools and Materials

What do you need?
Outer & lining fabric – it works really well if your outer fabric is a little thicker/ stiffer. Think calico, cotton canvas. This will help your basket have a bit of structure. If you aren’t sure if your fabric is quite thick or stiff enough you can add some interfacing before you sew it up. The lining can be a similar weight or simply a lightweight cotton. This is a really great stash buster project as the pieces required are small. Think curtain fabric remnants, old jeans it is a great way to breathe new life into a pile of scraps. Fabric for the hanging tab – as this is so small you can use anything as long as it isn’t too think. For ease you could also use a piece of ribbon. This works especially well if you want to have two tabs and make them longer to tie.
Kit – template (if you think you might make a few of these it is a good idea to make a template that will be a bit more durable than just thin paper. Any cardboard you have in the house works great for this.
Scissors, chalk/ pen, thread
Note
*when I say ‘right sides’ of the fabric, what I mean is the side you wish to be the finished one. If your fabric is printed/ pattered only on one side then this is the ‘right’ side. If it is self coloured then it works on either side.
Method
1. Create your template and cut around it. If you want to have a fold over at the top, add 1” to the height of the template piece.
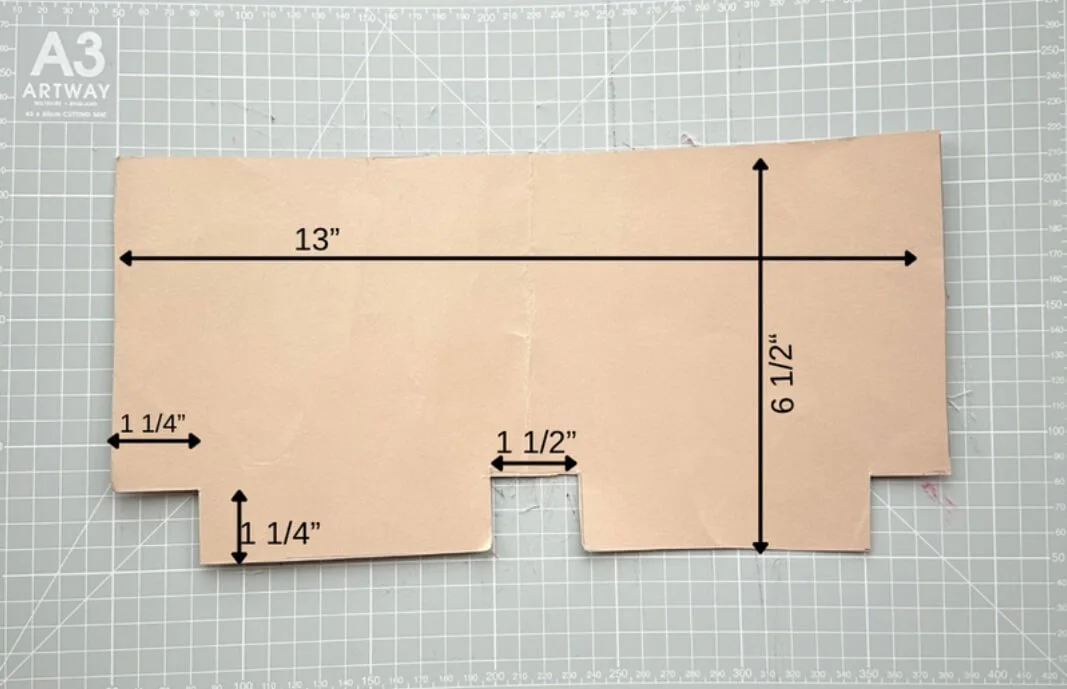
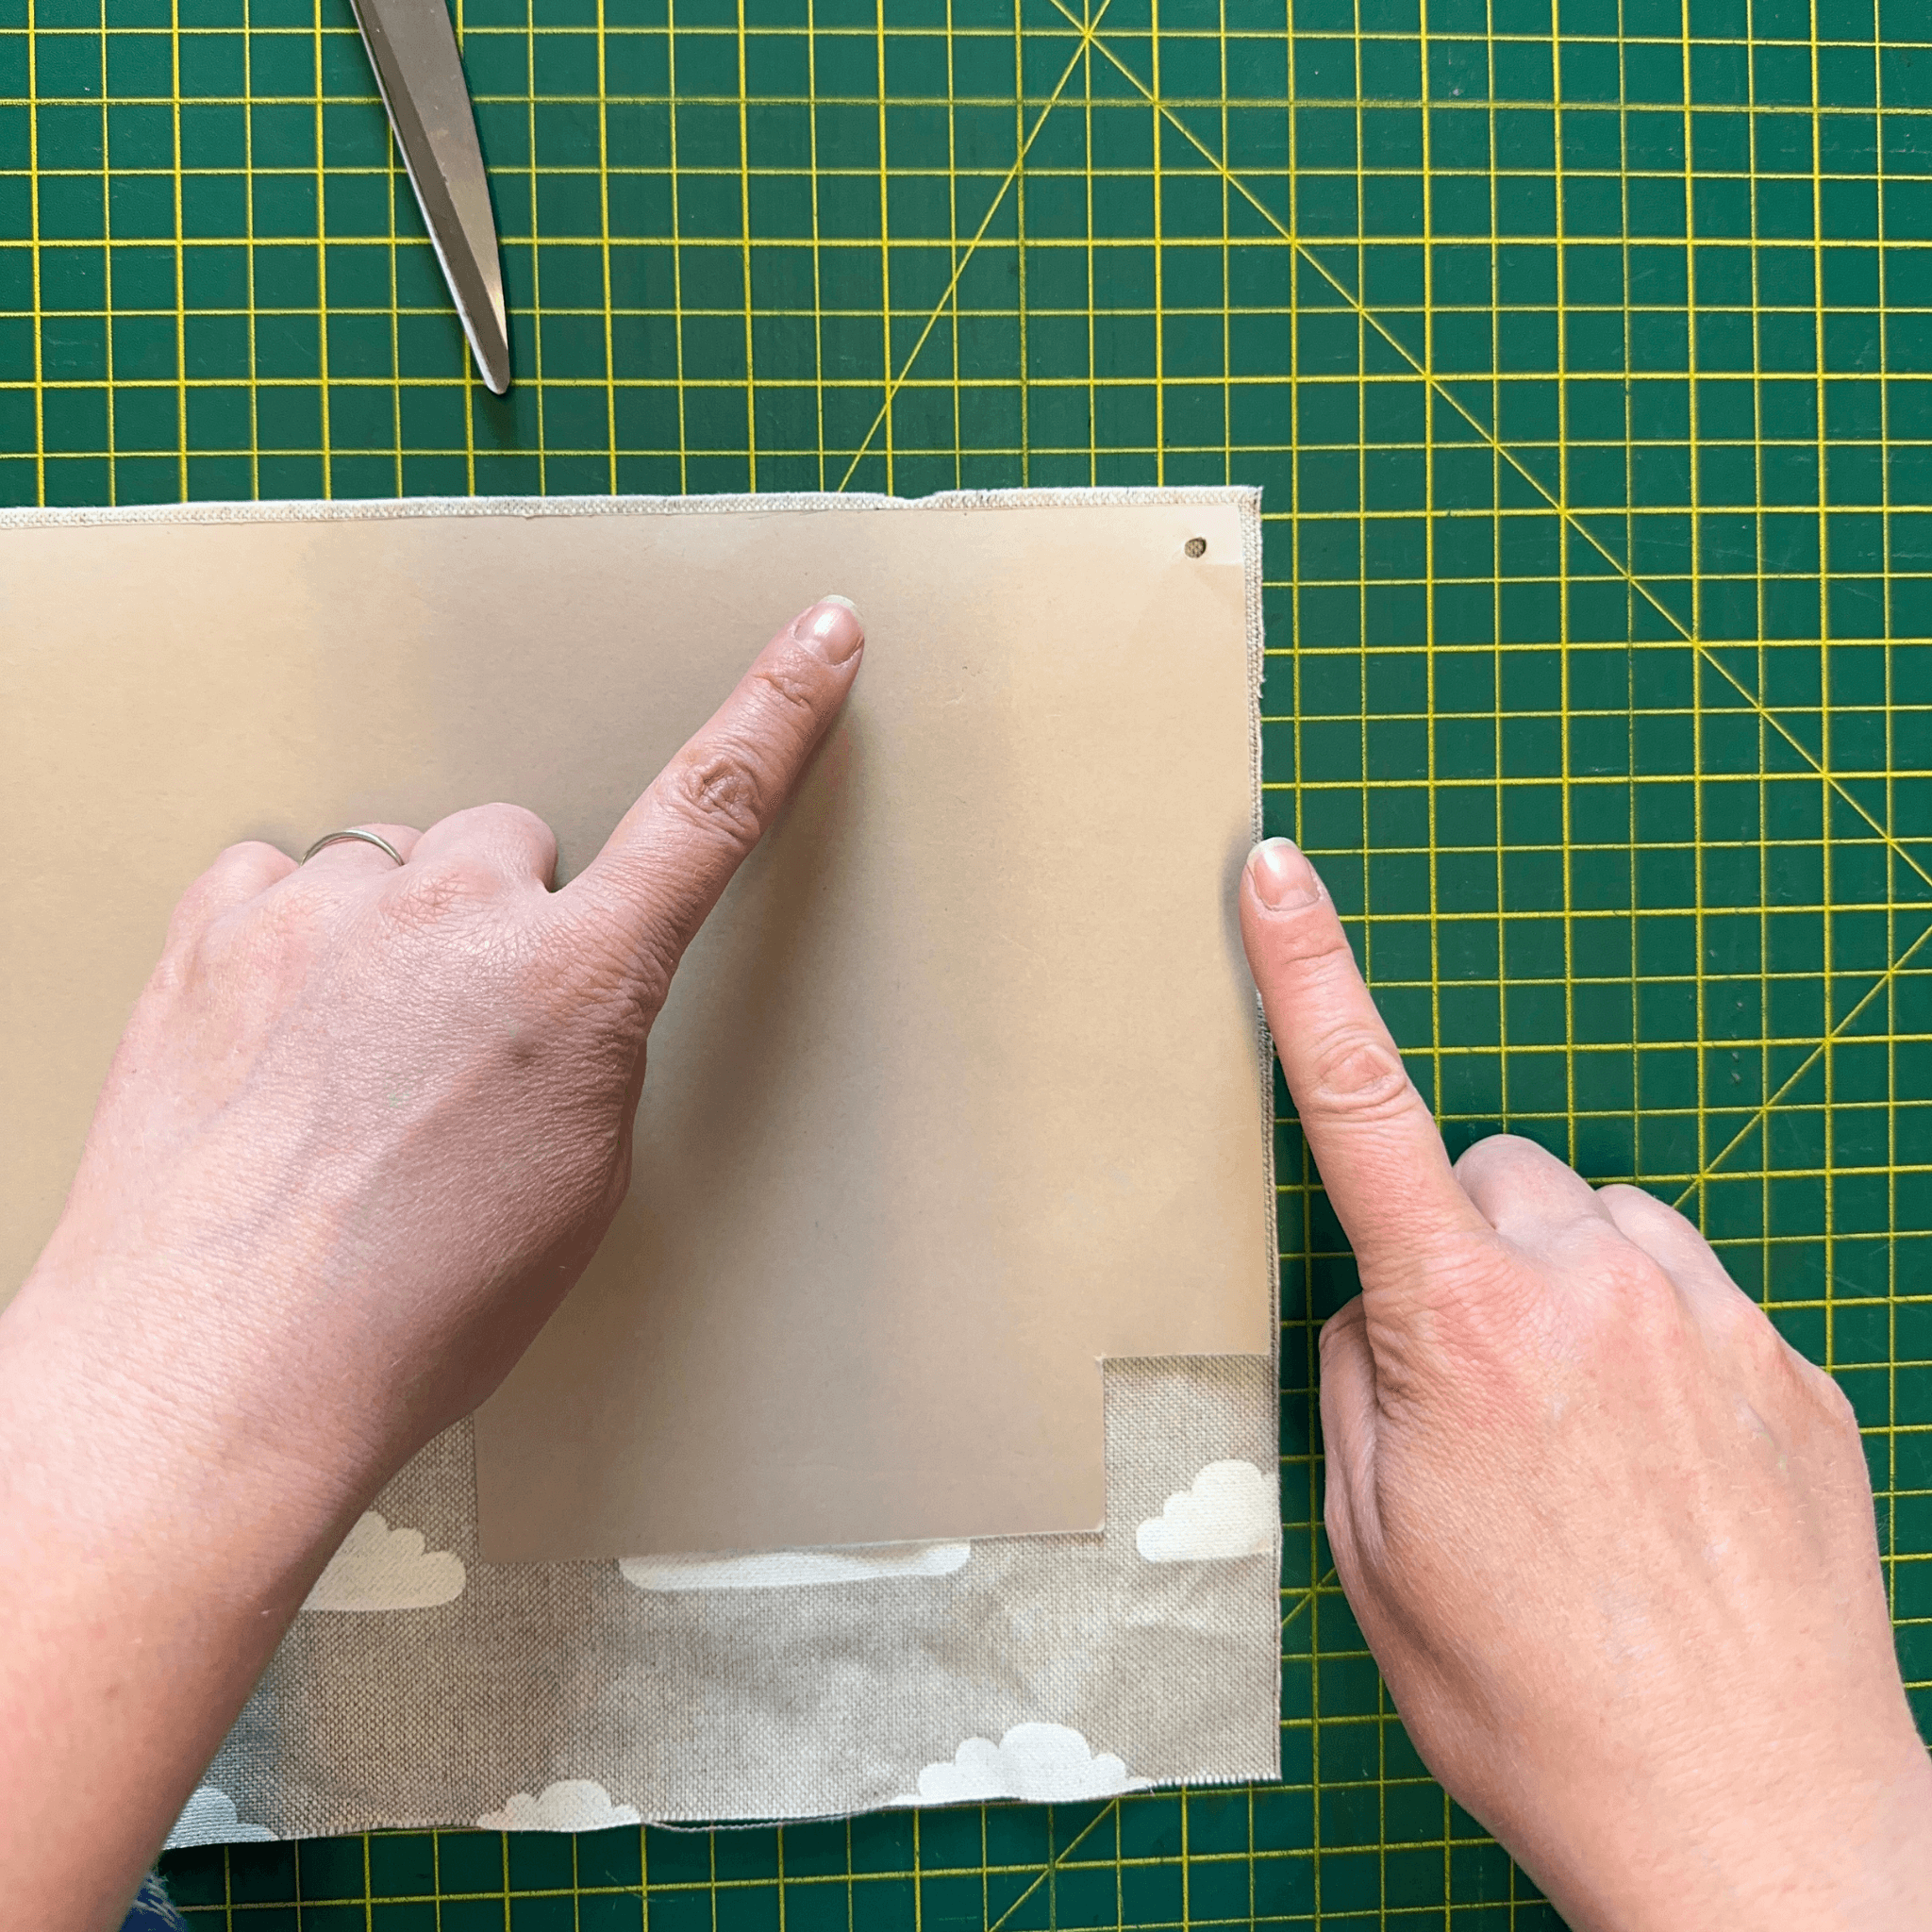
2. Draw around your template - once on your outer fabric and once on your lining. Be mindful of where you place your template on the fabric. You want to place it as close as you can to the edge of the fabric to minimise waste. Alternatively if you have a patterned fabric and want to include a specific piece of pattern make sure you place the template on this. Cut out both pieces.


3. Fold the lining in half (right sides together) * Using a half inch seam allowance, sew along the bottom (remembering to reverse at the start and end of your stitch line to secure) and then along the side seam, leaving an approximately two inch gap.

4. Fold the outer fabric in half, right sides together, and again with a half inch seam allowance sew along the bottom and side seam. This time leaving no gap.

5. For your hanging loop cut a piece of fabric 2” x 5 ½”. You can make this longer if you wish. If you want to create two ties rather than loops, you would cut two. Fold the fabric in half lengthways. Unfold, then fold the raw edges together to meet in the middle. Fold the whole piece in half lengthways. Your strip should be 1/2 “ wide. Sew close to the edge on both sides of the hander/ tie piece. You may want to use a contrast thread for detail.


6. Top stitch close to the edge of the folded piece, on both sides. You may want to use a contrast thread for detail.

7. Mark 3” in from the seam on the right side of the outer fabric.

8. Being careful not to twist the hanging loop, place it either side of the mark, with the raw edges matching up with the raw edges of the outer fabric and the loop facing down towards the bottom of the bag. Stitch loop in place close to the edge of the fabric.

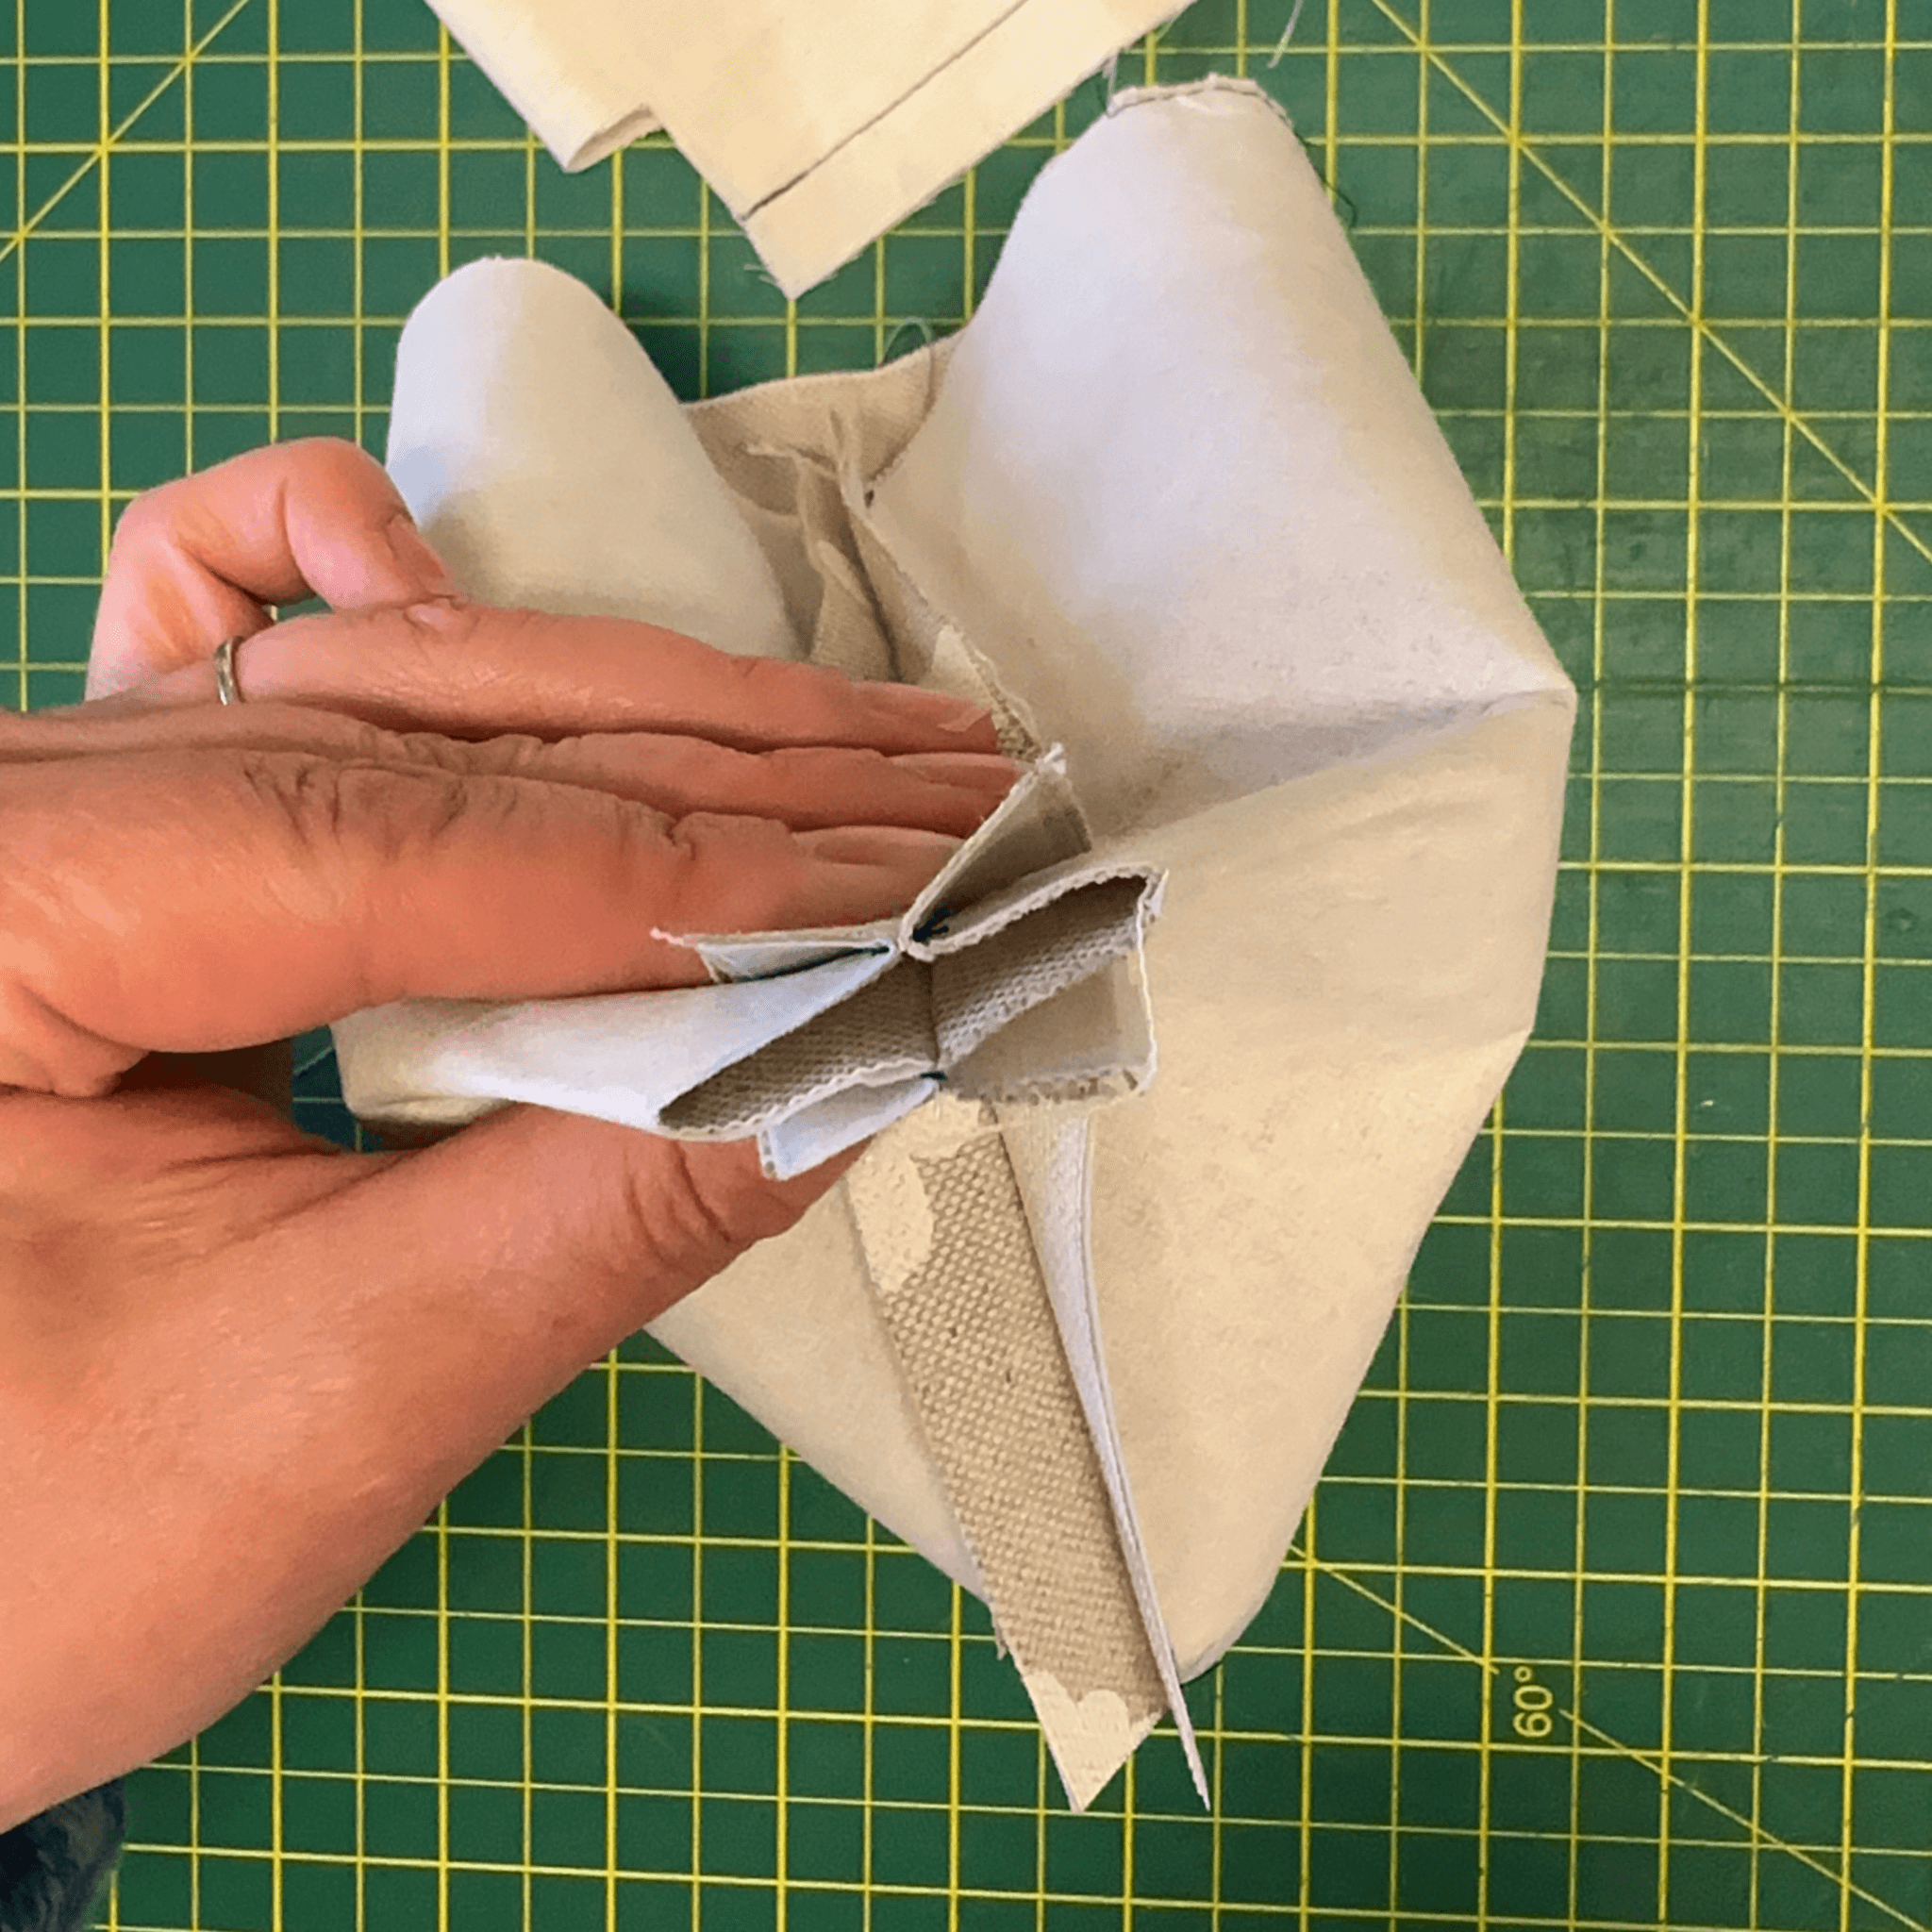
9. Press the seams flat with your fingers and bring them together, keeping the seams lined up. Using a 1/2 “ seam allowance, sew across both corners, on the outer fabric and the lining.

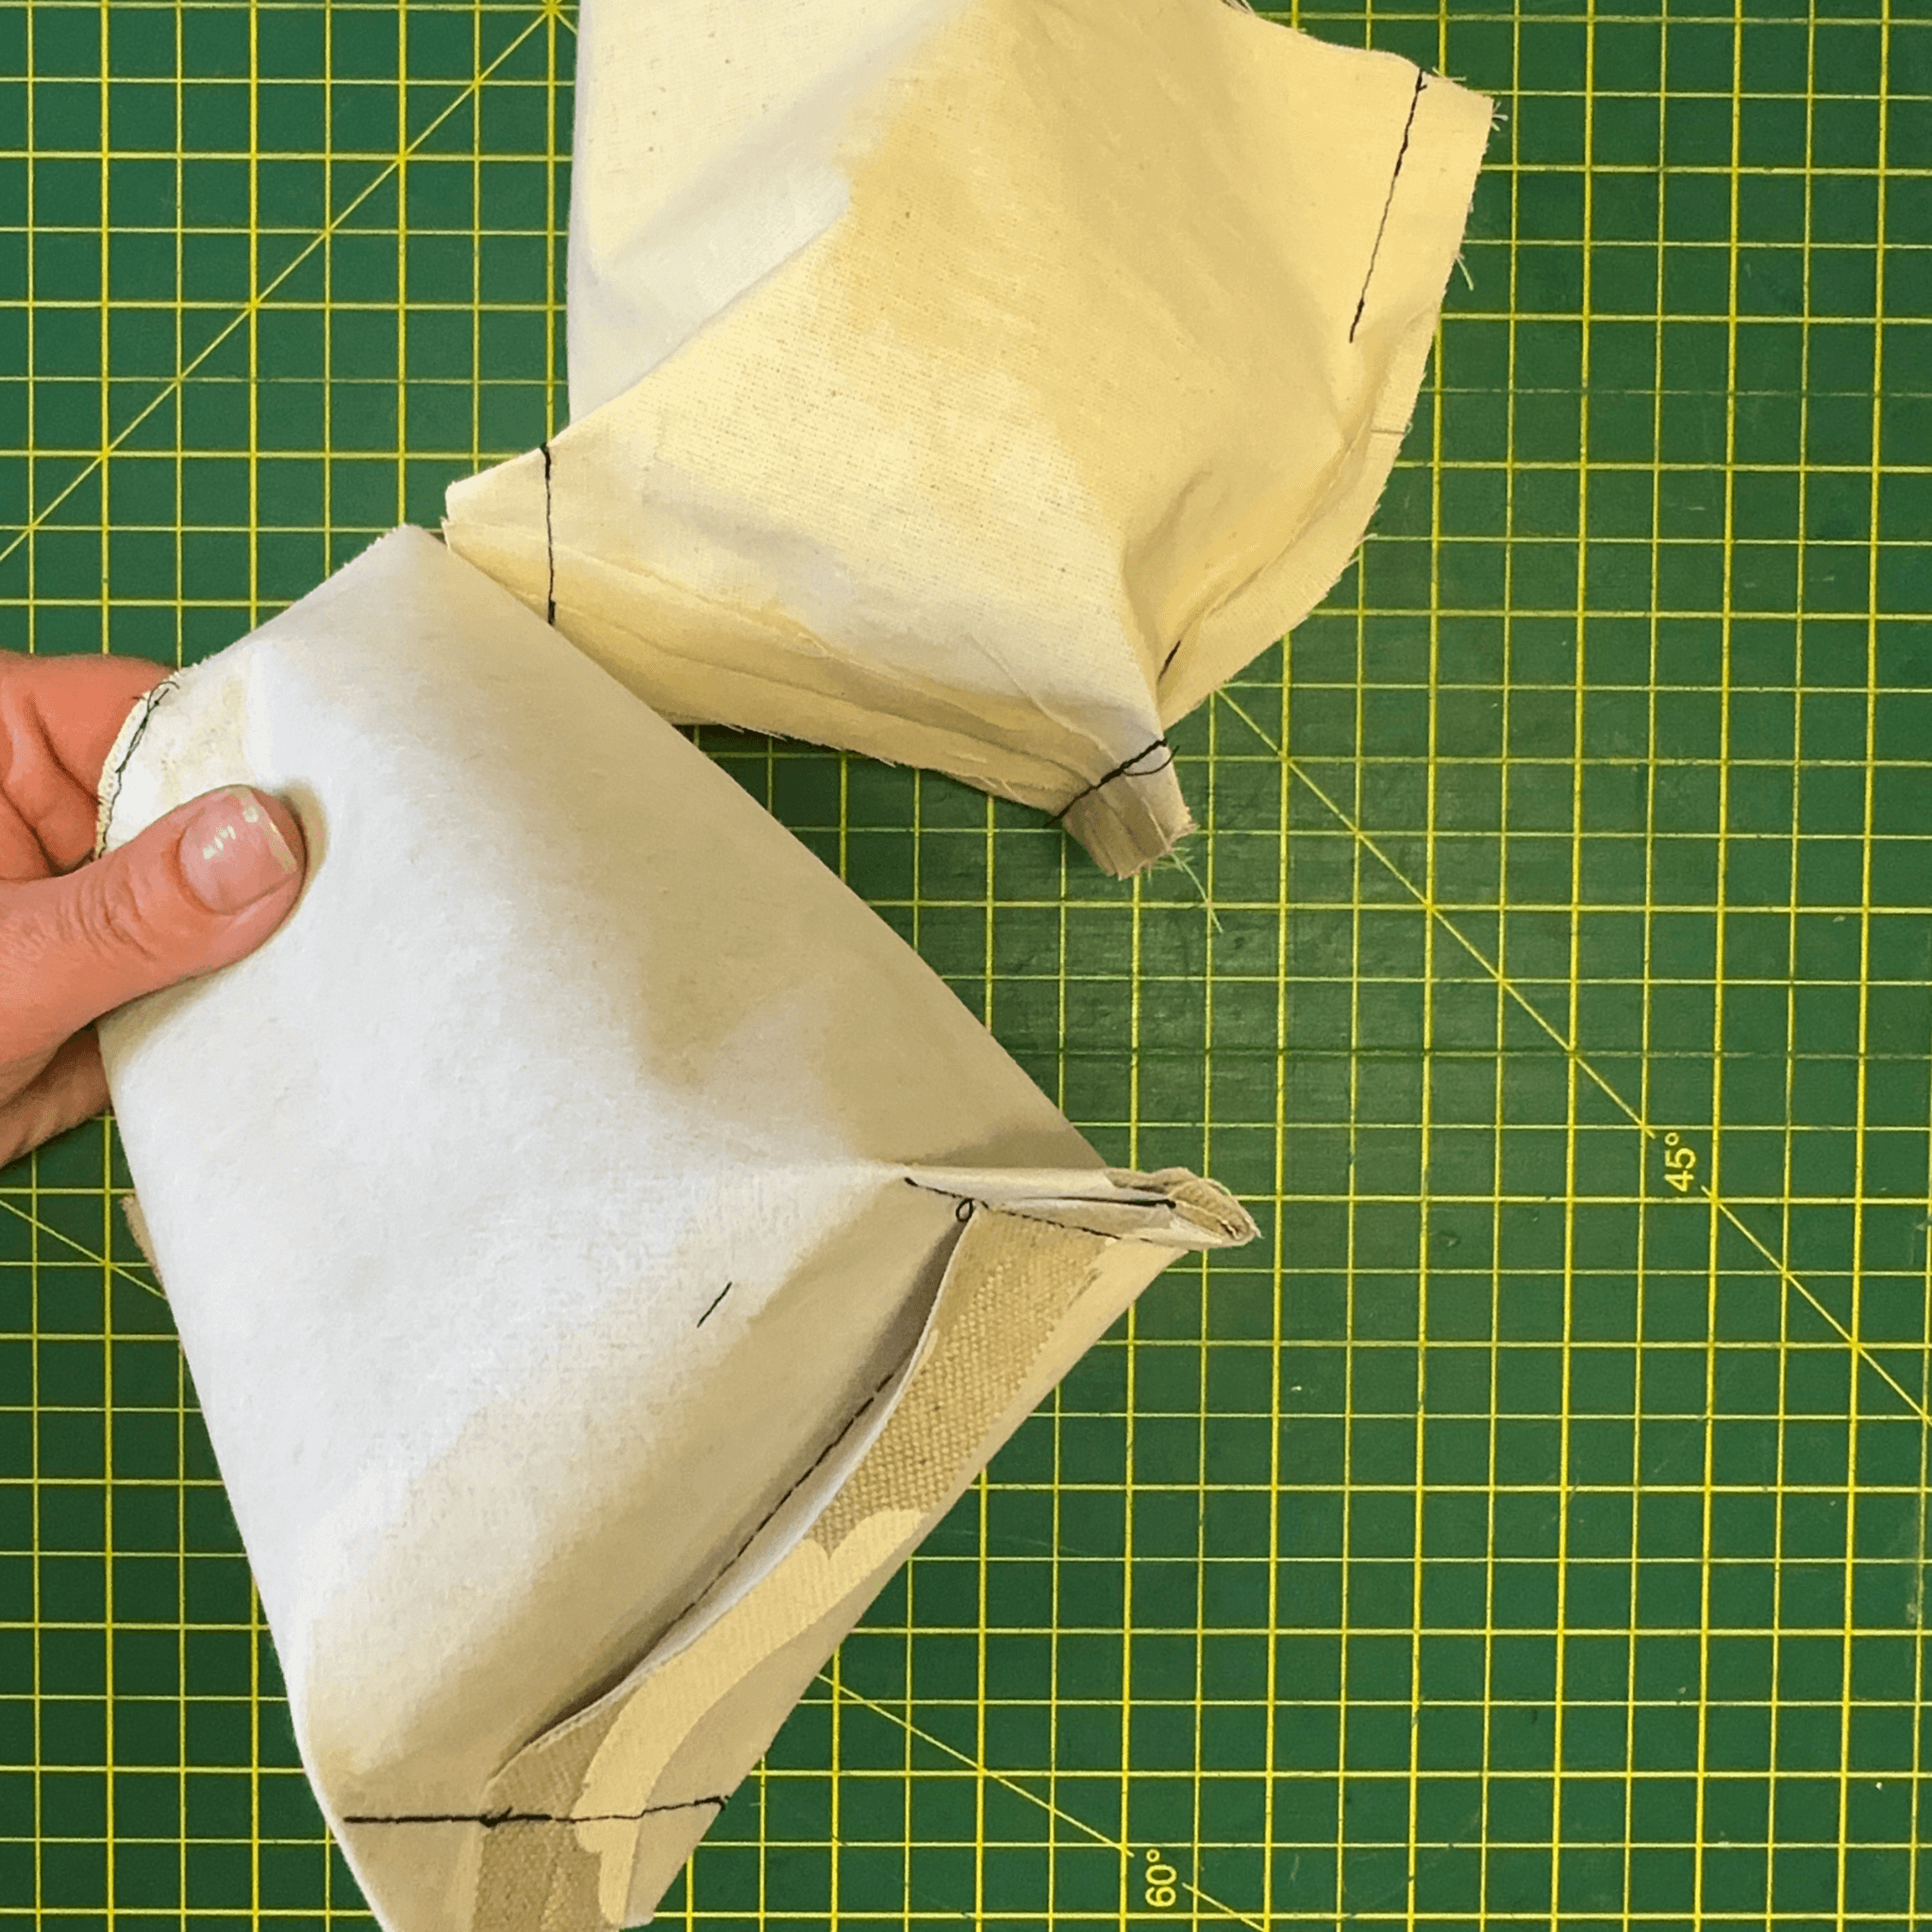
10. Both pieces will now look like this.
11. Turn the outer piece so the right side is facing outwards. Insert this piece into the lining. Line the seams of both pieces up, and make sure the raw edges of both are lined up.

12. Secure these in place with pins or clips if you prefer. Using a ½ “ seam allowance, stitch around the top, sewing both pieces together.

13. Pull the outer fabric through the hole in the lining until the whole thing is right side out.

14. Line up the edges of the hole you left in the lining. You have two options to close the lining up. If you want to have a completely invisible seam and make the basket fully reversible, hand stitch this closed with ladder stitch. (tutorial coming soon) Or, you can machine stitch it closed for a very acceptable neat finish. If machine stitching, use a short stitch length and a thread that matches your lining fabric. Stitch the hole closed as close to the edge of the fabric as you can.

15. Turn the lining inside the outer piece. If you want to topstitch around the basket finger press the seam at the top to get it nice and even. WELL DONE!
